
This process is very similar to allowing a server to relay email in Exchange 2010, The scenario is you have a server, lets say a backup server that once it completes its backup job you would like it to email and Administrator to say whether it is successful or not. By default this server will send the email out however it will not get to the recipient as the Exchange 2013 or Exchange 2016 server will not allow the server to send email via itself. Follow the guide below on how to allow a member server or desktop to relay email through Exchange 2013 and Exchange 2016.
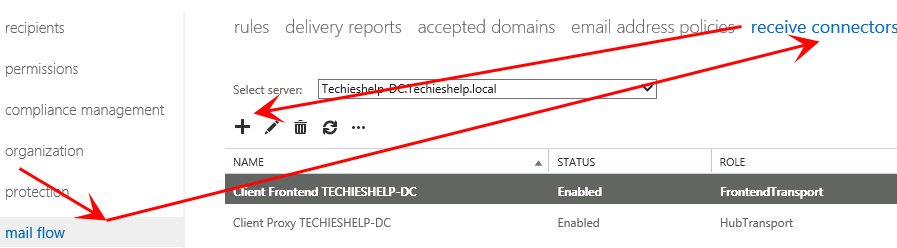
We will do this via the ECP, so first launch the ECP, log in then select Mail Flow in the left hand menu, then on the right hand side select Receive connectors, we finally click the “+” sign as we are going to create a new receive connector.
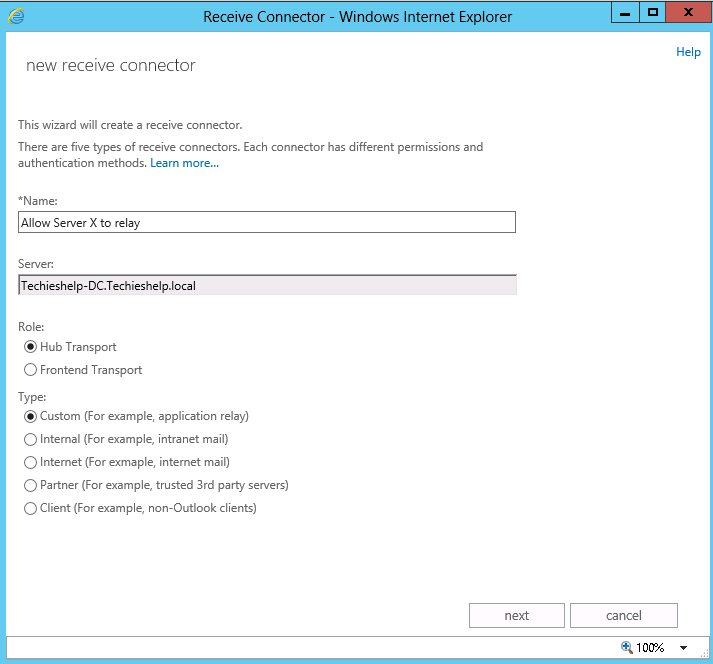
On the following screen we need to specify what type of connector we are going to create The first choice is front-end transport or hub transport. depending on the location of the server you want to allow to relay determines the type of connector you use. See below.
- Hub Transport service –This role is used inside the organization, and between the Front End transport service and the Mailbox Transport service. Ao any internal servers will use this role to relay internally or send email externally.
- Front End Transport service This service runs on all CAS servers and acts as a proxy for all inbound and outbound external email for your Exchange 2013 / Exchange 2016 organization. Effectively you would use this to allow an external server to relay.
In this example we are allowing an internal server to relay, so we select Frontend Transport. Our “type” is customer as we are allowing an application on another server to be able to send email through Exchange 2013 and Exchange 2016 , make your choices and then click next.
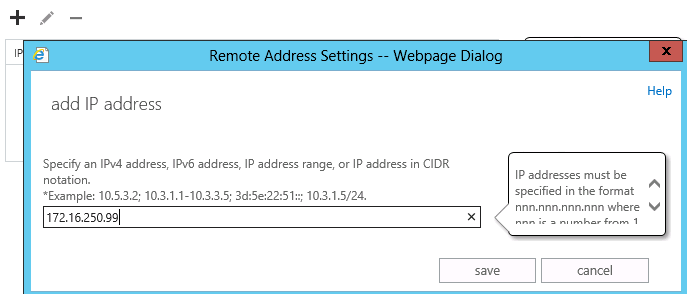
The next screen basically ask which IP address you would like to accept this mail on your server, leave the default setting as this server will accept mail on whatever address is configured.Click next We now need to specify the IP address of the server that is going to relay email By default, it will allow all IPv4 address on your network to relay email through this connector by using 0.0.0.0 – 255.255.255.255 , if you like you can leave this HOWEVER, this means any piece of nasty malware on a PC can then send email out if it decides to. To remove the default setting highlight the entire sub net and click the “-” to remove. We will now specify the IP address of the server we want to allow through. Click the “+” sign then enter the IP address of the server you want to relay, the backup server etc. As seen below.
Click save and your relay connector in Exchange 2013/2016 is created and active.