
How to migrate mailboxes from one Office 365 tenant to another using LepideMigrator for Exchange
Acquisitions and mergers between organizations are often immediately followed by the consolidation of their assets. There are a number of risks associated with this consolidation; including but not limited to data loss, corruption or misuse of information. The most important thing in ensuring the security of your shared folders is to have a proper plan for migrating mailboxes from one Office 365 tenant to another.
There are numerous ways you can perform this migration, but some ways are perhaps more effective than others. Migrating using native tools can be a difficult and time-consuming process when you’re dealing with a large number of mailboxes. Many organizations find that it makes more sense to deploy an automated solution, like LepideMigrator for Exchange. In this article we will show you how easy migrating mailboxes from one Office 365 tenant to another becomes with the help of LepideMigrator for Exchange.
Step 1: Pre-migration analysis
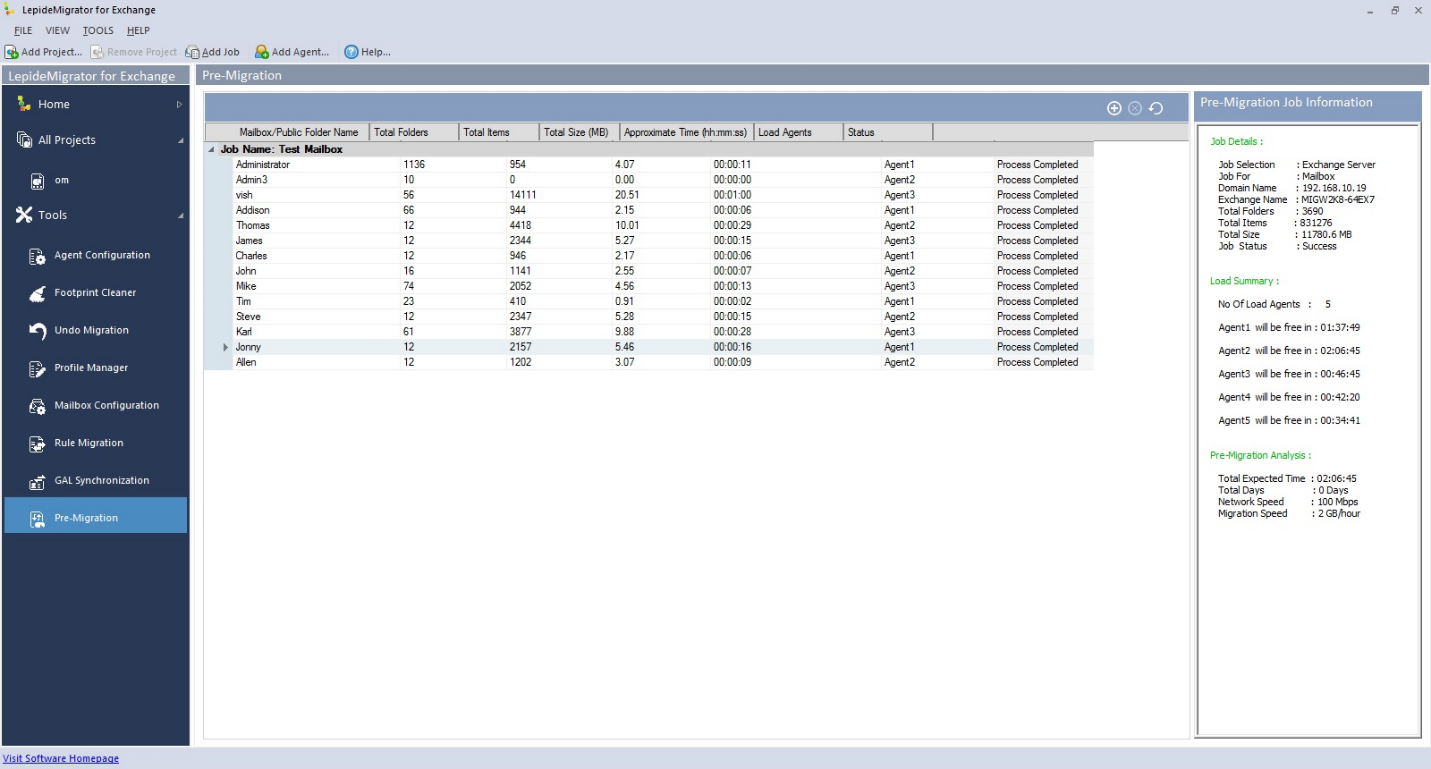
Pre-migration analysis allows you to avoid problems that may arise during the migration. If there are any issues that may potentially lead to an error in the migration, then this analysis will let you know before you start. The first step of the migration is to create a mailbox migration analyzer job.
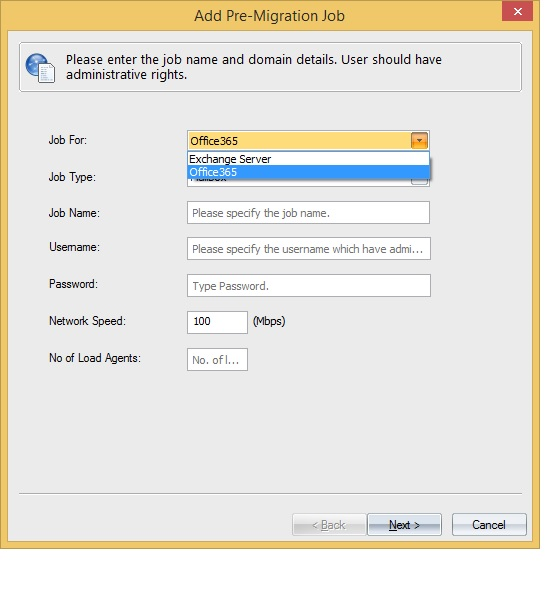
Create a mailbox Migration Analyzer Job
- Enter the domain details and job name in the Add pre-migration job wizard.
- Select the mailboxes which you want to migrate.
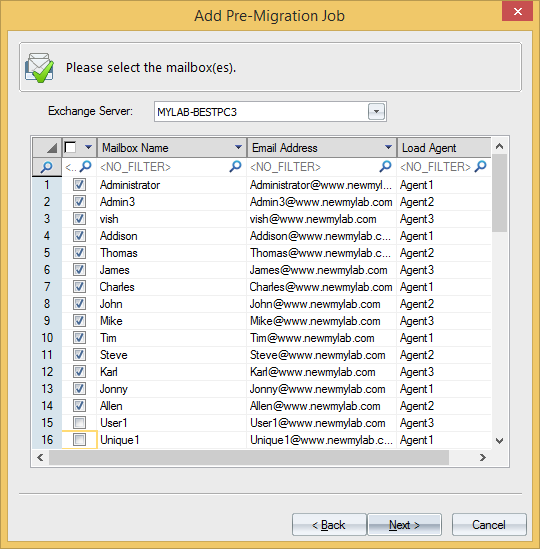
- The next step is to apply filters on the basis of “Message Classes”, “Date Range” and “Folders”. In the pre-migration page, you can see the total count of items against each mailbox item along with the size and the estimated migration time.
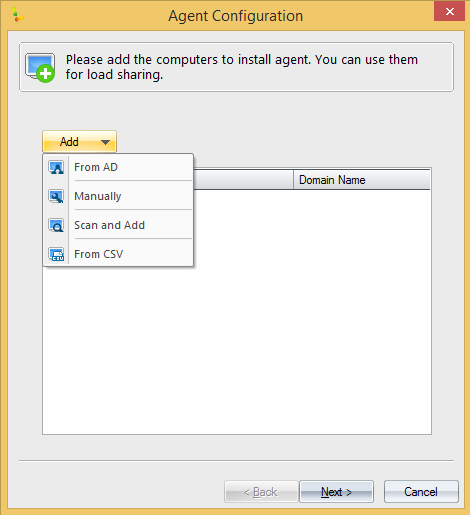
Step 2: Configuring agents
When migrating a large number of mailboxes, you may want to spread the load and utilize other resources in your environment. With LepideMigrator for Exchange you can use the resources of the of the network computers’ RAM or Processor by configuring agents. You can install agents in four ways:
- From AD: To add computer from Active Directory.
- Add Manually: To add computers manually.
- Scan and Add: Scan the entire network and add the intended computer manually.
- Add from CSV: Use a CSV file to add the intended computers.
Newly added agent will appear in the Agent List Page.
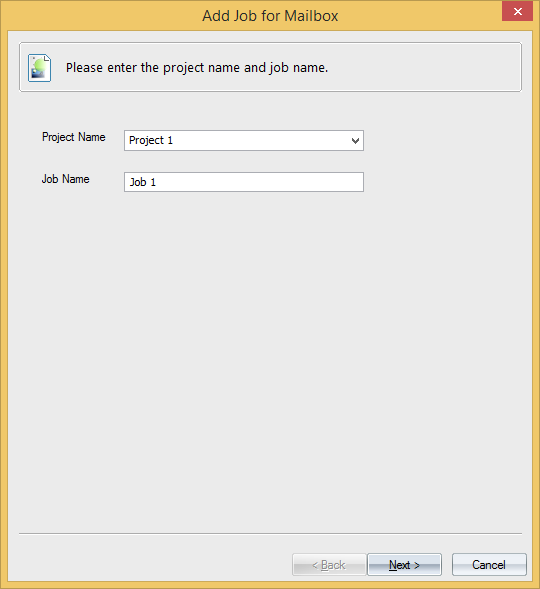
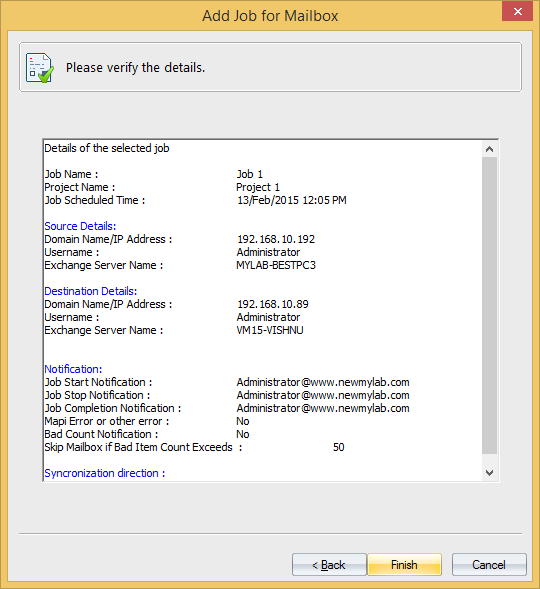
Step 3: Add job for mailboxes
- Enter the name of the project and the job.
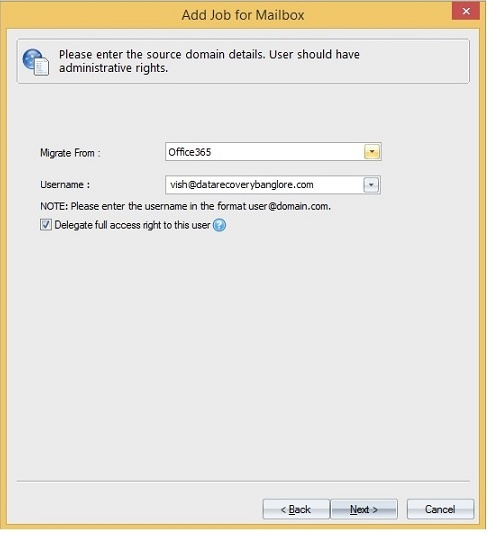
- Enter the source domain details. Here enter Office 365 in the source domain. For this you must have administrative rights. After selecting Office 365, the following screen will appear. Enter the username.
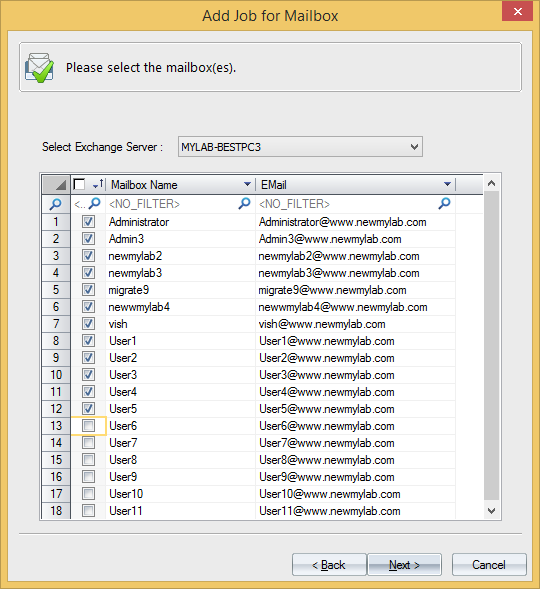
- LepideMigrator for Exchange will connect you to the source domain. Select the mailboxes you want to migrate and then click on next.
- Enter the target domain details. There are four ways to enter target domain details:
- Same Domain (Single Exchange): This will migrate mailboxes to existing the mailbox in the same Exchange Server.
- Same Domain (Multiple Exchange): This will migrate mailboxes to new a mailbox in a different Exchange Server.
- Different Domain: This will migrate mailboxes to a new/existing mailbox of a different domain’s Exchange Server.
- Office 365: This will migrate mailboxes to Office 365 mailboxes.
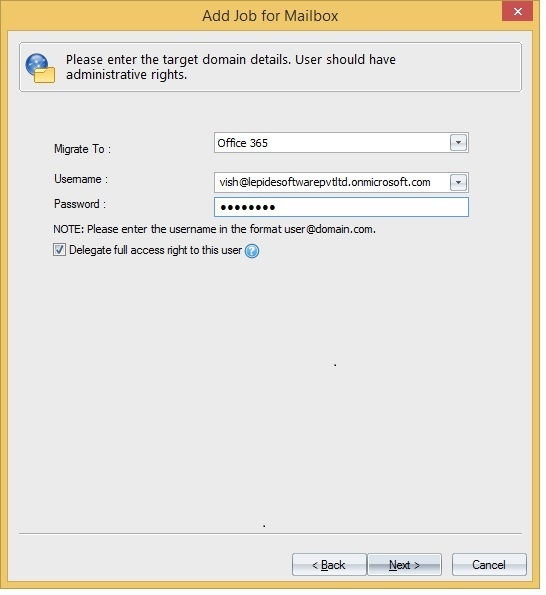
As we want to migrate mailboxes to Office365 tenant, we will choose Office 365 as the destination.
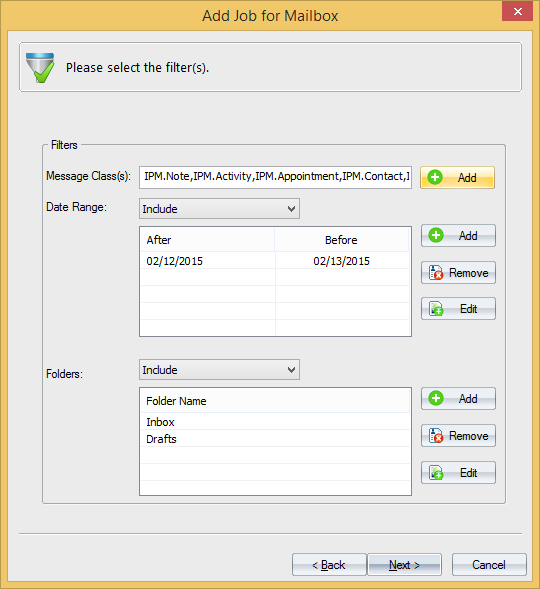
- Now, apply filters to migrate only the necessary messages. Filters can be applied on the basis of different factors such as message class, date range and folders.
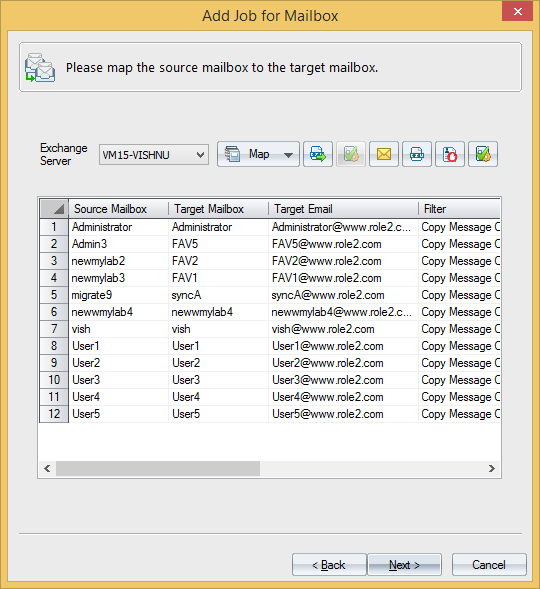
- Map source and target mailboxes. There are two ways to map mailboxes:
- Map Automatically: In this case, the mapping will be done on the basis of their name.
- Map Using CSV: In this case, mapping will be done by using the mappings stored in a CSV file.
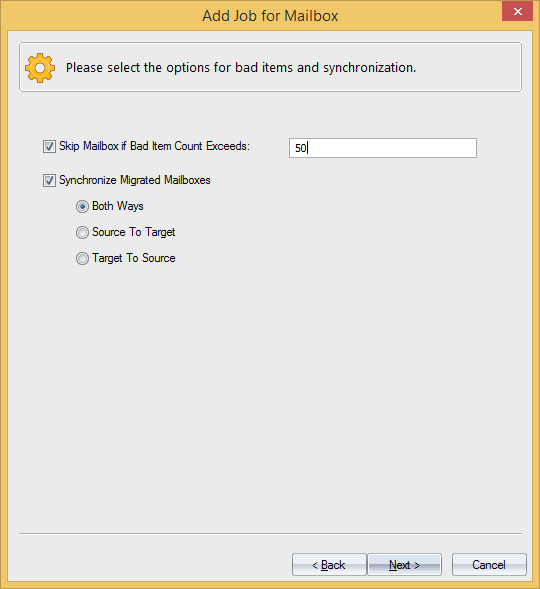
- The solution gives you the option to skip mailboxes if the defined bad item count exceeded. You can also synchronize migrated mailboxes to achieve co-existence between them. There are three ways by which you can synchronize source and target mailboxes.
- Both Ways
- Source to Target
- Target to Source
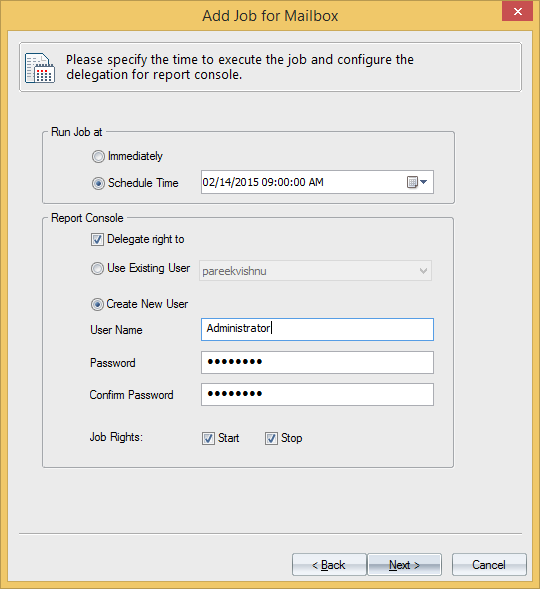
- You can either run the job immediately or you may schedule it to run at some later time.
- Review the summary of the entire process in this screen.
If you have followed these steps correctly, then you will have successfully completed the migration.
Conclusion
LepideMigrator for Exchange makes migrating mailboxes from one Office 365 mailbox to another easy and quick. Using this solution mitigates the risks of data loss and provides a much more effective way to migrate than relying on native processes alone.