How To Install and Configure InterScan Messaging Security Virtual Appliance
In this guide we will install and configure Trend Micro InterScan Messaging Security (Virtual Appliance) 8.5 step by step, The environment this installation is being built on is VMware Vshpere 5.5 and the Interscan messaging appliance will be protecting Exchange 2010, however the configuration will apply to Exchange 2007 and also Exchange 2013. We start by Installing the Virtual Appliance into VSphere.
How To Install Interscan Virtual Appliance Into VMware
To install the Virtual Appliance we need to create a Virtual Machine. I recommend you give the Virtual Machine a minimum of;
- 8 Gig of RAM
- 4 CPUS
- 250 GIG HD
- When creating the VM select Linux and Centos 4/5 64bit
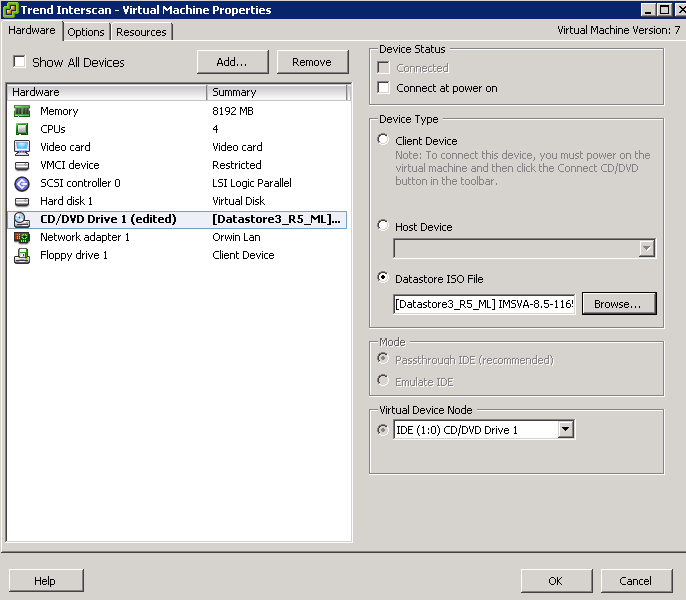
Once created upload the ISO or browse to the ISO you have downloaded on the client machine, set the VM to boot from the ISO as seen below.
Now boot the VM and view it via a console session. The installation of the Interscan virtual appliance is quite simple.
Select Install IMSVA and the appliance will go off and install itself.

Then accept the Trend License Agreement.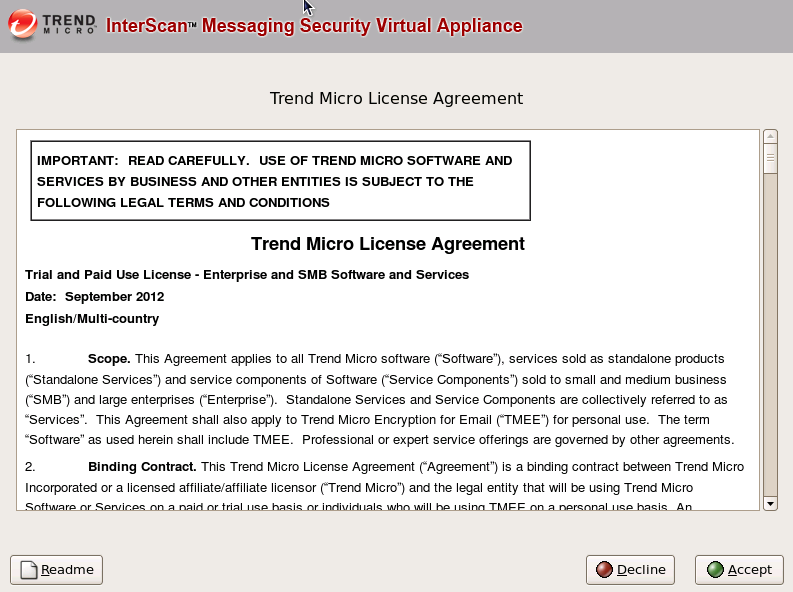
Choose your relevant language.

Select the Hard Disk you created, Trend Interscan Suite will partition this drive to its requirements.

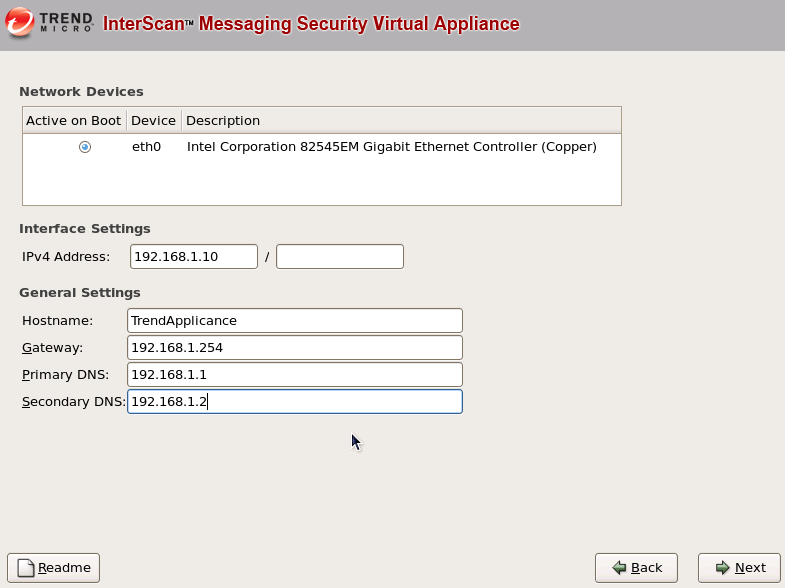
You will now see a summary of the options you have chosen. Next we need to give the Appliance an IP, Host name and enter the IP of your DNS servers, do so as appropriate then select the timezone.
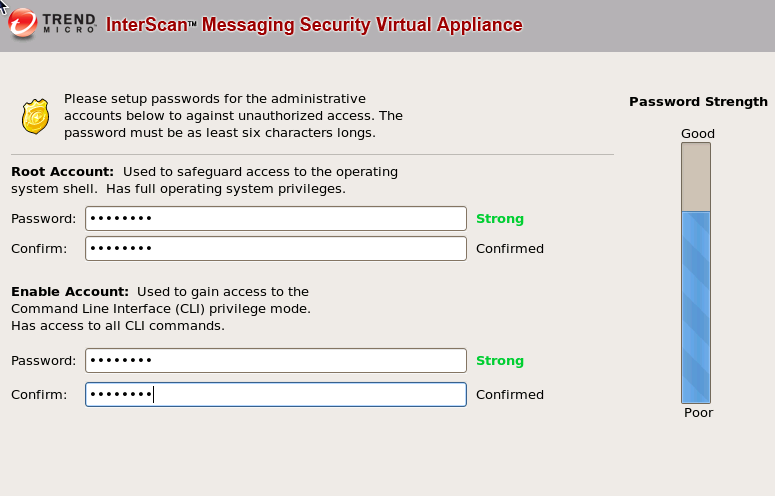
Enter some secure passwords.
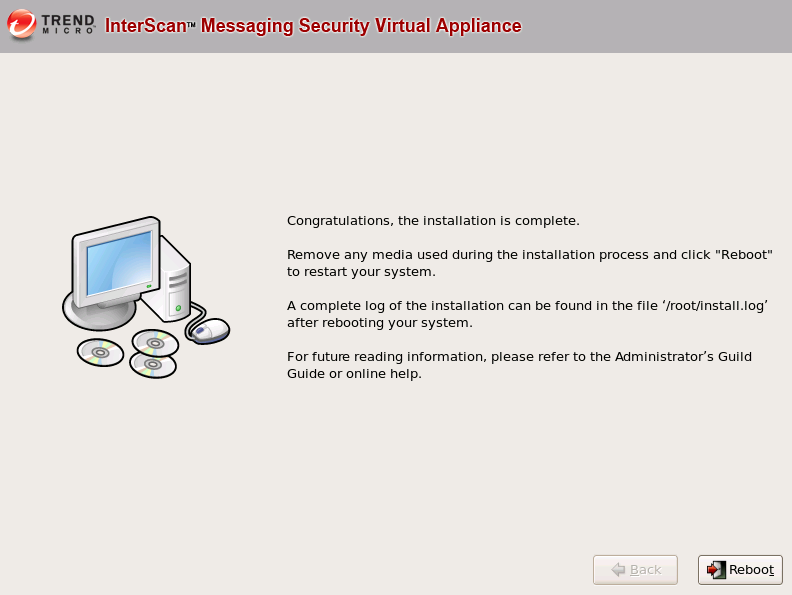
Trend Interscan will now show you a final summary, if you are happy then click next to install. The install will take around 10 minutes, once done you will see the final screen. Reboot as requested and it will complete the final install.
How To Configure Interscan Virtual Appliance
Once rebooted browse to the IP address that you gave the appliance, Interscan default port is 8445. The default account is Admin and the password is imsva. Once logged in.Once logged in you are greeted with the configuration wizard. After click next at the welcome screen you will a screen with the settings we setup during the appliance install, if you are happy with these click skip.
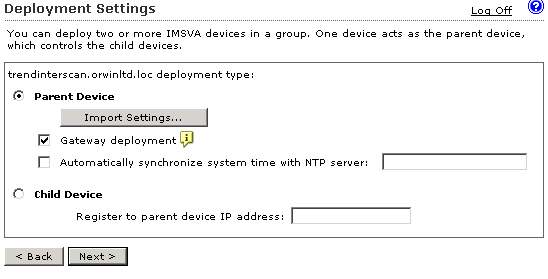
You can configure multiple IMSVA`s, the next screen allows you to do so, in our environment we are using a single parent device so we select next.
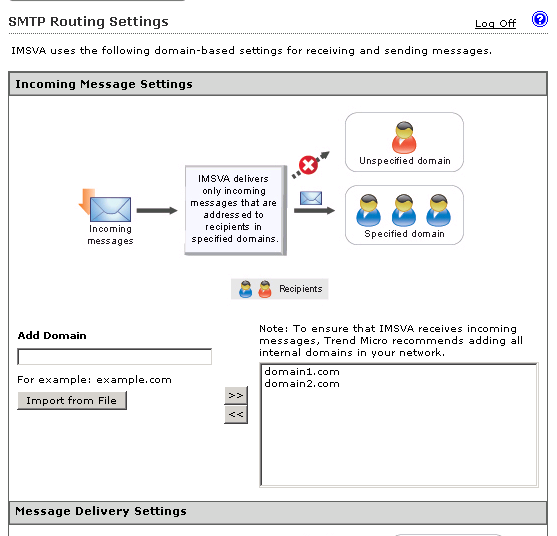
One the next screen we need to enter all the domains we want to accept mail from. The easiest way to get this information is to log into the Exchange EMC and go to the accepted domains tab and copy the domains configured there.
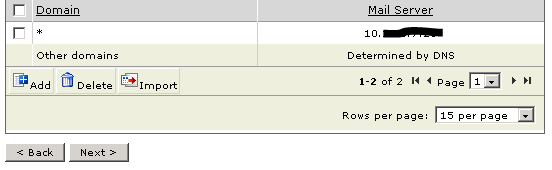
 The next screen we click add, we then tell the IMSVA that for all domains (*) to user our server (IP Address). Then clickn ext.
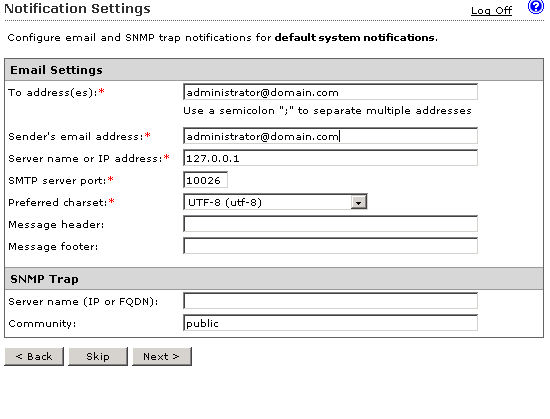
Next we configure our notification settings, this is where configure system messages from the IMSVA, also we specify the email address that the mail comes from. We can also specify headers and Footers, here you would user for example “Spam Mail Detected”. One the server address male sure you enter your internal Exchange servers address and the SMTP port will be 25. Then click next.
Then next screen is the auto update screen. By default the IMSVA will update direct from Trend, if you use a proxy you will need to enter your proxy servers IP and its relevant port.

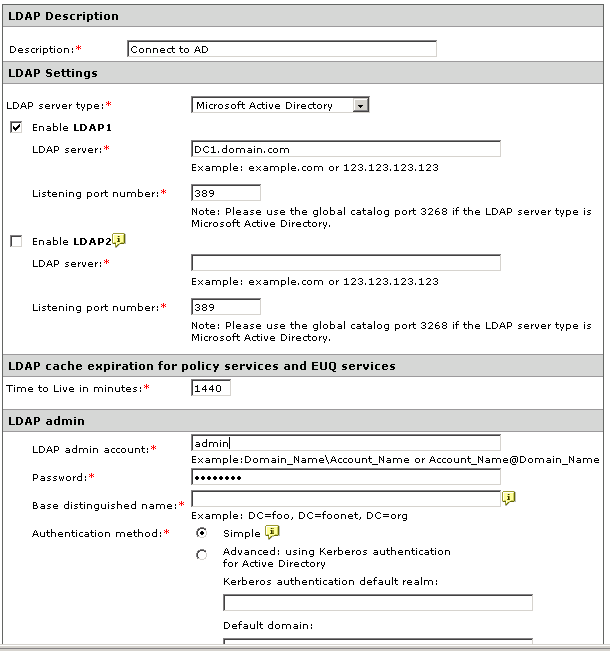
Next up is LDAP, this is where we tie our domain to the IMSVA, this is useful if we want to create reports based on users accounts and its also useful for managment. As seen in the screen shot below, you need to enter the FQDN of your domain controller and also the domain administrator username and password. Do so then click next.
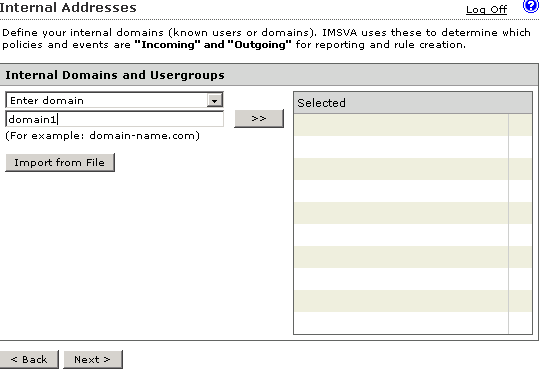
Next we configure the domain that will be used for reporting, basically enter the domain with your user accounts in it.
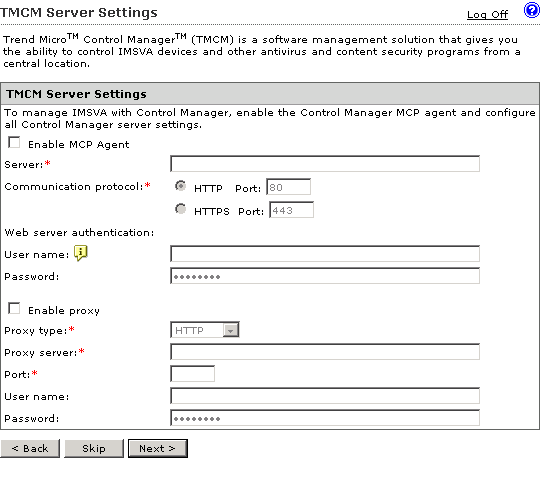
The next option relates to Trend Micro Control Manager. If you use this product to control other Trend products such as IWSS or Server protect you can configure this section the allow TMCM to manage IMSVA, I do not run TMCM so I skip this step.
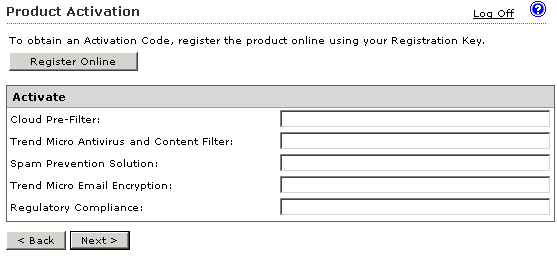
We are now almost fully configured to allow the product to work. we must now activate the IMSVA by entering our product keys. Do so then you will see the final summary screen. Accept it and continue.
That is the basic installation and configuration of the IMSVA covered. By default all the anti spam and anti virus settings are at default. Check out the Trend Micro section of the website to find out how to configure each section of the IMSVA for information on how to block domains, block senders and run reports.