
Step by Step Migration of File Shares to Sharepoint Online
In this guide ill show you how easy it is to migrate files from on premise servers to Sharepoint online. The process we will follow is quite simple and it will allow you to keep files in sync on premise with sharepoint until you decide to flip over permanently . From a high level view we will do the following:
- Create a page in Sharepoint online called “Documents”
- Add a Sharepoint Document Library to Documents Page
- Initial File sync to SharePoint Document Library
- Delta Sync to SharePoint Document Library
- Tidy up
Create a Page in Sharepoint Online
- Log into 365
- Open your SharePoint site where you would like to host documents.
- Navigate to the site where you want to add a page.
- Click the Settings button (Gear icon) on the Navigation bar, and then click Add a page.
- Enter a page name, call it Documents
- The direct address to the page appears below the name box.
- Click Create.
- A new page appears with a blank area to create a layout and add content.
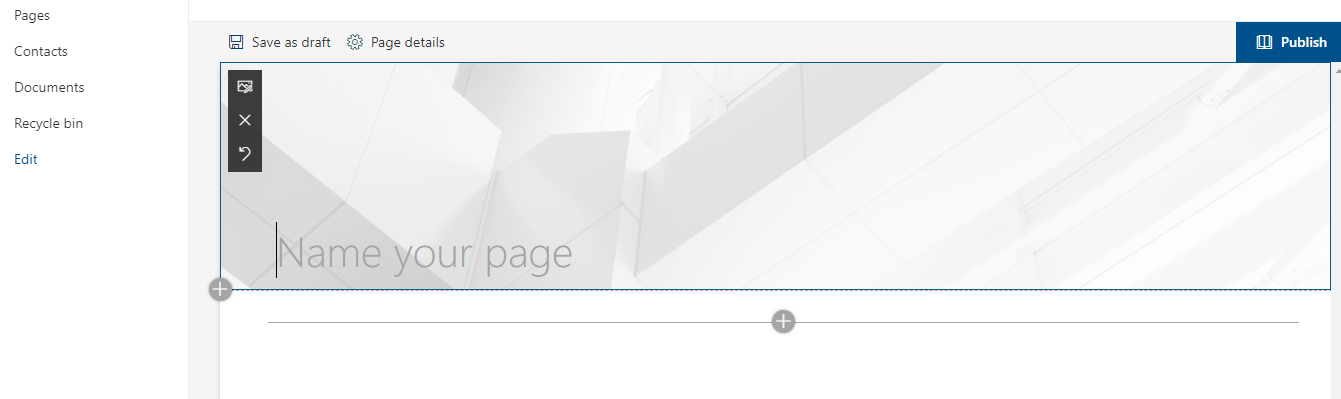
Creating a Page in Sharepoint Online
Add a Sharepoint Document Library to Documents Page
- Browse to the new documents page
- Select “edit”
- Click the “+” sign under page title
- Select Add Document Library
- Name and Describe the Library
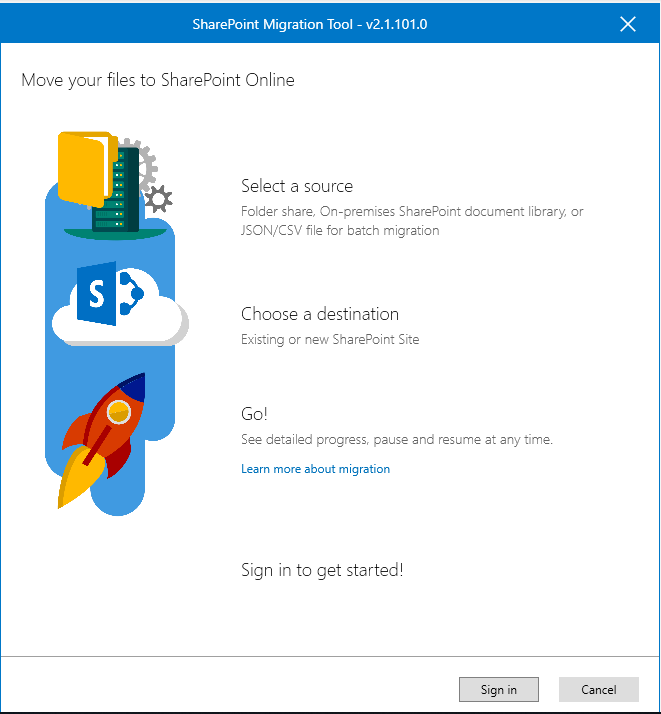
 Initial File sync to SharePoint Document Library

To migrate our files to SharePoint we will use the SharePoint migration tool V2 click the link to download. This tool allows us to select a local folder and then upload the documents and the folder structure to the SharePoint library we have created. We can create batches of jobs that allow us to run the batch as incremental jobs, allowing us to do a final sync before switching to online. Again this is a simple process, however be aware that some files may not sync if they are beyond the non standard character length. At the end of the migration, the tool will notify us what has not synced.
- Download and install the Sharepoint Migration Tool.
- Sign into the tool with your Office 365 Global Account.
- Select the File Share or folder to migrate.
- Enter the Sharepoint Destination Site.
- Click the Down Arrow and select the Document Library we Created.
- Select Add
- Click Save Task ( This will allow us to load the JSON file in to run this task again).
- Click Migrate
Your files will then be scanned the migrated to SharePoint Online, this may take a while depending on the amount of data and the speed of your connection to the internet. If any files fail to sync you can click on the link to see what and why it failed. Generally it is due to file lengths.
Delta Sync to SharePoint Document Library
To run a delta sync (any files that have been added or changed since last sync we can load the batch job JSON file and run the sync again.
- Sign into the tool with your Office 365 Global Account.
- Select the source and load the JSON file we saved in the previous task.
- Click Migrate
Tidy Up Time
With your files now migrated the SharePoint there are a number of tasks to carry out such as the following:
- Set permissions on your new document library
- Disable the share on the file server. There are two methods, the quick and dirty way or more time consuming.To disable all shares from a command line run the below to kill the service that shares folders.
net stop lanmanserver
To stop shares more gracefully we can do the following, we can use Net Share to show all shares:
net share
Share name   Resource                        Remark
-------------------------------------------------------------------------------
C$           C:\                             Default share
IPC$                                         Remote IPC
DATA$       C:\DATA                          Remote Admin
Then we can use Net Share with the delete flag to remove the shares.
net share DATA$ /DELETE
Hopefully this guide has show how simple it to migrate files to sharePoint, yes we can do a lot more but to start off for beginners hopefully this helps
Tags: Sharepoint, Sharepoint Migration Tool

Marc
| #
Your link to the migration tool is broken
Reply
Allen White
| #
Thanks, updated 🙂
Reply
Chris Clark
| #
Does the migration tool allow you to transfer any additional document library columns/metadata? Does this have to be done afterwards? I have content on premises in SP2013 which we need to transfer to SPOnline. Thanks for your help!
Reply
bagley
| #
When this is done, will files sync from the server to sharepoint automatically, but save a copy on the local server as well? Also, why disable the share on the file server? Thanks so much for this article and help!
Reply